Setup Notes given
Note: Click on the view button to see the full size.
In-depth Setup configuration (1)
Setup overview:
- 2 VM
- Ubuntu 18
- Mininet 2.2.2
- Putty (Optional)
- Virtual Box
VM Setup
Network Host Adapter Setup
(If you already have this, you can skip this step)
-
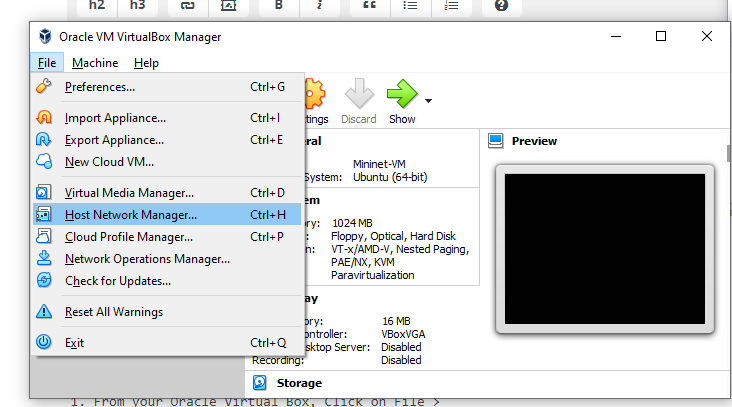
From your Oracle Virtual Box, Click on File > Host Network Manager
-
Click on create and follow the following settings
- Adapter:
- Check Configure Adapter Manually
- IPV4 Address:
192.168.56.1 - IPV4 Network Mask:
255.255.255.0
- IPV4 Address:
- DHCP Server:
- Check Enable Server
- Server Address:
192.168.56.100- Server Mask:
255.255.255.0 - Lower Address Bound:
192.168.56.101 - Upper Address Bound:
192.168.56.254
- Server Mask:
- Adapter:
- Check Configure Adapter Manually
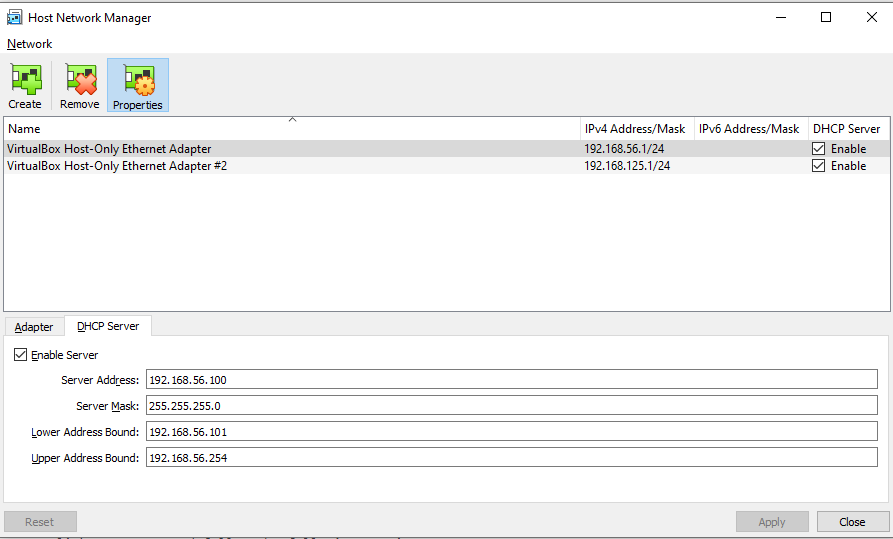
- Ensure that it is enable

Ubuntu and Mininet Network Setup
Ensure that the mininet and ubuntu both are connected using the network host adapter that was created the previous. Note that the VM must not be running when creating this setting.
Right click the VM > Setting > Network > Adapter 2
- Enable Network Adapter
- Attached to: Host-only Adapter
- Name: The name of the Network host adapter created
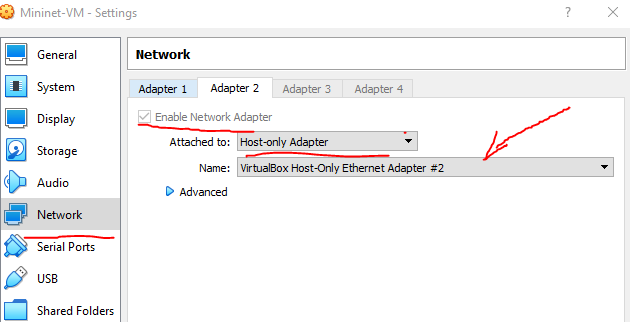
Theres no need to do any advance configuration
Mininet
Login Credentials: - Login: mininet - Password: mininet
-
Check your configuration by running
ifconfig -a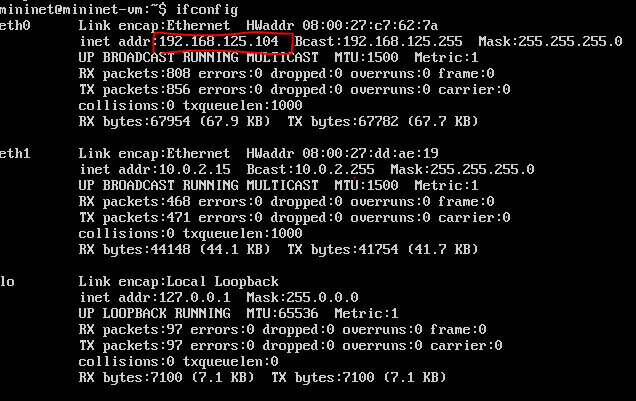
- Setup Virtual box Additional Setup
- Create dhclient
sudo dhclient eth1 - Edit the /etc/network/interfaces file using nano
sudo nano /etc/network/interfaces - Add the following lines below the code
 auto eth1
 	iface eth1 inet dhcp
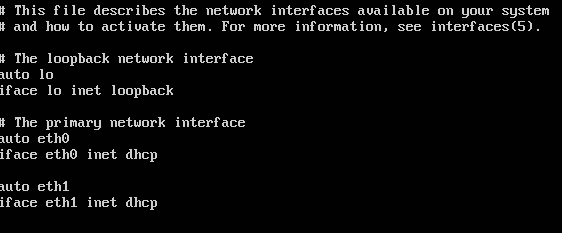
- Create dhclient
-
(OPTIONAL) SSH into mininet using putty ip: (Check your
ifconfig)192.168.125.104port: 22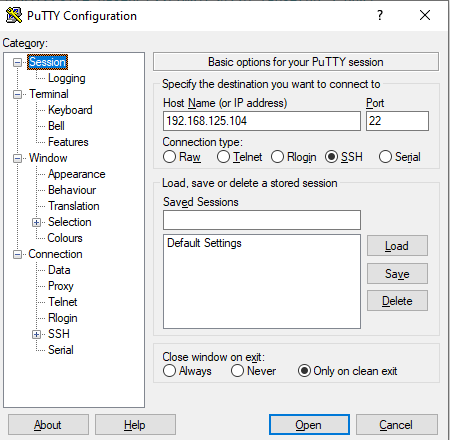
- Test Mininet
- Start Mininet
$sudo mn - Check the nodes
mininet> nodes - Check the network
mininet> net - Check the nodes ifconfig
mininet> h1 ifconfig - Ping h1 to h2
mininet> h1 ping h2 - Ping all
mininet> pingall - Quit MN
mininet> quit - Clear settings
$sudo mn -c
- Start Mininet
Check Configuration on both VM
-
Run
ifconfigon both VM- Mininet

- Ubuntu
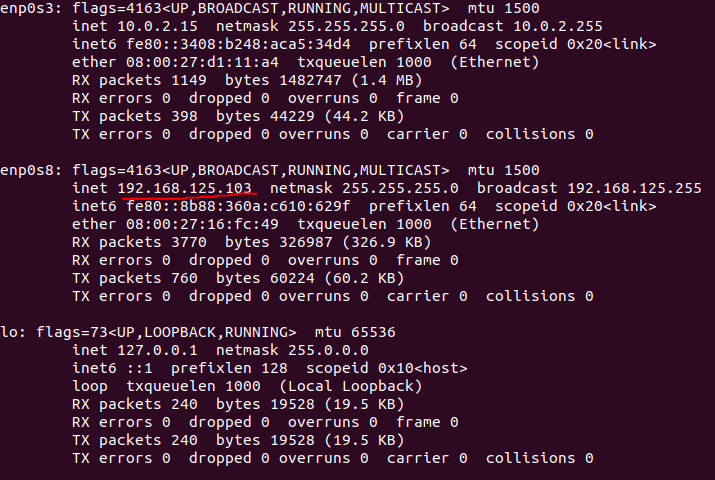
From this, we can tell that Mininet is hosted at
192.168.125.104and Ubuntu is located at192.168.125.103 - Mininet
-
Ping both side Run the following on both VM
- On Ubuntu VM
ping 192.168.125.104 - On Mininet
ping 192.168.125.103If its correctly configured, it should be pinged successfully
- On Ubuntu VM
POX
Pox only runs on python2 so ensure that your not executing python3 at all times. The following test would determine if and if
- Clone pox and use the correct version
git clone https://github.com/noxrepo/pox cd pox git checkout fangtooth - Start Pox
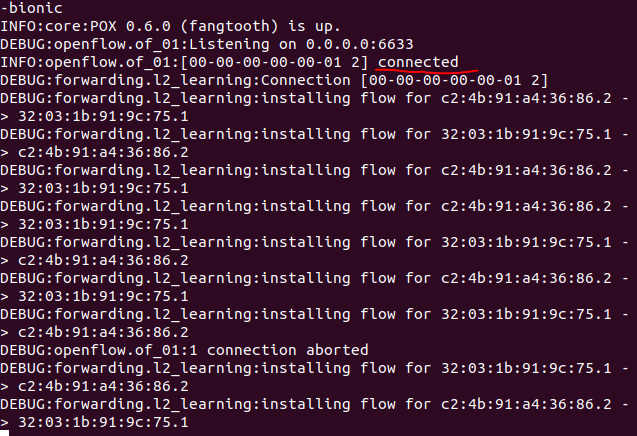
./pox.py log.level --DEBUG forwarding.l2_learningYou should see the following sample output:

This means that pox controller is located at 0.0.0.0 for our Ubuntu but accessing it from outside would use
<Ubuntu_IP>which in this case is192.168.125.103 -
Start mininet
Since Ubuntu is running at
192.168.125.103, we would use it to connect our mininet vm with.sudo mn --controller=remote,ip=192.168.125.103,port=6633Ensure that theres no space between the commas
-
Check your ubuntu
You should be able to see a new connection from your ubuntu pox controller. This means you have successfully connected both your mininet and your pox controller!
Sample Ubuntu output pox:
Sample Mininet output:
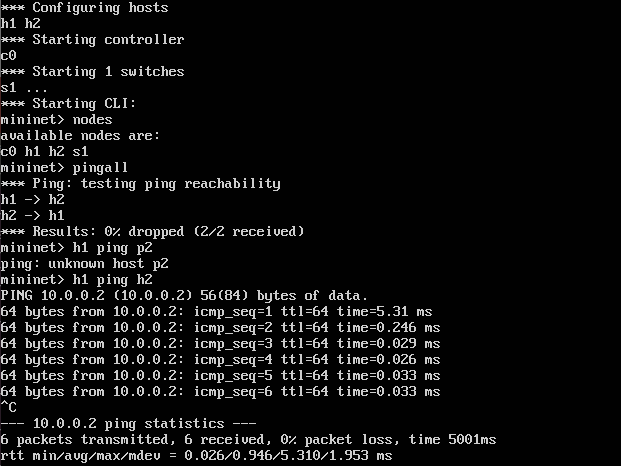
Note: 2 commands were used, pingall and h1 ping h2